Spring Data REST

Spring Data repositories 위에서 hypermedia-driven REST web service 를 쉽게 만들 수 있는 Spring Data REST 에 대해 정리해보자.

Intro

multi-domain object 시스템을 위한 REST 웹 서비스를 구현하는 것은, 지루하고 반복적인 작업이고 많은 boilerplate code 를 생성한다.
Spring Data REST 는 Spring Data repositories 위에 구축되고 자동으로 REST resource 를 노출한다.

Getting started

Dependency

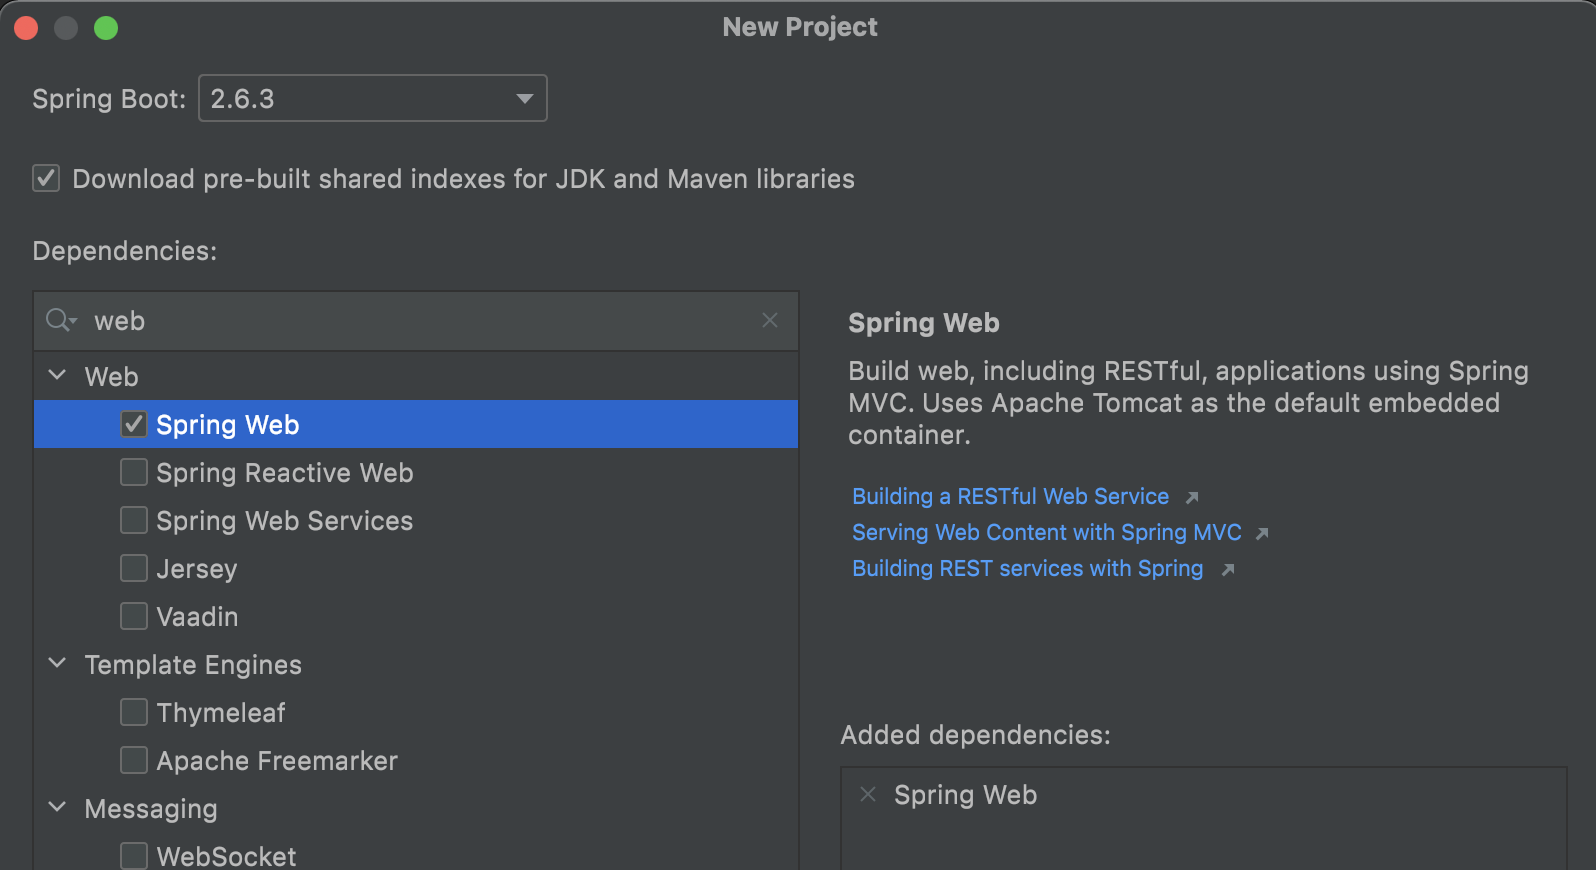
Spring Boot project 에 Spring Data Rest 의존성을 추가해보자.

1
2
3
dependencies {
implementation("org.springframework.boot:spring-boot-starter-data-rest")
}

URI

default 로, Spring Data REST 는 root URI 인 ‘/‘ 에 REST resources 를 제공한다.
application.properties 에 아래와 같이 base URI 를 변경할 수 있다.

1
spring.data.rest.basePath=/api
Read more

WireMock

외부 API 를 테스트할 때 유용한 도구인 WireMock 에 대해 알아보자.
WireMock 은 HTTP mock server 이다. 핵심적인 기능으로,

  • 특정 요청 (stubbing) 에 대해 미리 준비된 응답을 할 수 있고,
  • 유입된 요청을 capture 하여 verification 이 가능하다.

Setup

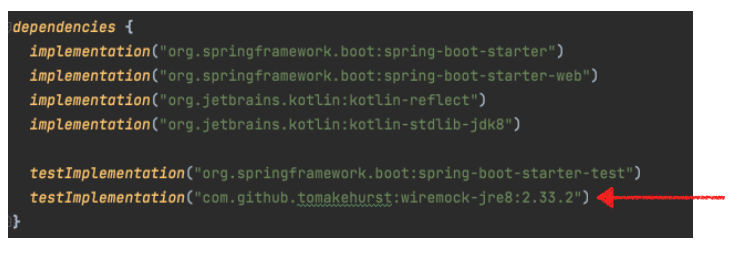
wiremock 을 사용하기 위해 필요한 dependency 를 추가하자.

Basic Usage

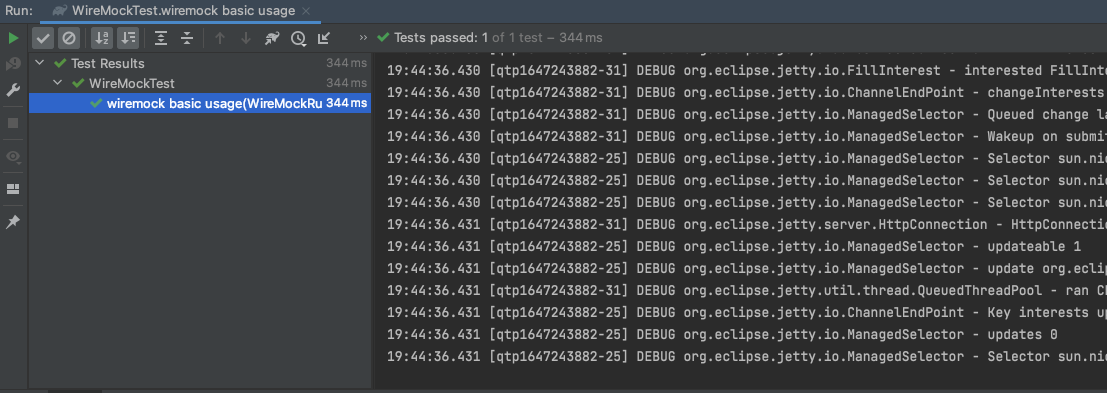
JUnit5 를 기준으로 테스트해보자. @WireMockTest 로 간단히 테스트 가능하다.
WireMockRuntimeInfo 를 통해서는, port number 나 base URL 등의 정보를 얻을 수 있다.

1
2
3
4
5
6
7
8
9
10
11
12
13
14
15
16
17
18
19
@WireMockTest
class WireMockTest {

@Test
fun `wiremock basic usage`(wmRuntimeInfo: WireMockRuntimeInfo) {
// given
stubFor(get("/static-dsl").willReturn(ok()))

// when
val testRestTemplate = TestRestTemplate()
val response: ResponseEntity<String> = testRestTemplate.getForEntity(
"${wmRuntimeInfo.httpBaseUrl}/static-dsl",
String::class.java
)

// then
assertEquals(200, response.statusCodeValue)
}
}

Stub

Read more

Bean Validation

Bean Validation 은, JSR 303 에서 처음으로 제안된 어노테이션 기반의 Java Bean 검증 명세이다.
대표적인 구현체로 Hibernate Validator 가 있다.
spring-boot-starter-validation 의존성을 명시하면, hibernate-validator 의존성이 추가된다.

Bean Validation

Bean Validation 은 JSR 303 에서 처음으로 제안되었다.
최초에 제안된 명세의 내용은 다음과 같다.

1
2
3
4
5
6
7
8
9
10
Validating data is a common task that is copied in many different layers of an application, from the presentation tier to the persistence layer.
Many times the exact same validations will have to be implemented in each separate validation framework, proving time consuming and error-prone.
To prevent having to re-implement these validations at each layer, many developers will bundle validations directly into their classes, cluttering them with copied validation code that is, in fact, meta-data about the class itself.

This JSR will define a meta-data model and API for JavaBean validation.
The default meta-data source will be annotations, with the ability to override and extend the meta-data through the use of XML validation descriptors.
It is expected that the common cases will be easily accomplished using the annotations, while more complex validations or context-aware validation configuration will be available in the XML validation descriptors.
The validation API developed by this JSR will not be specific to any one tier or programming model.
It will specifically not be tied to either the web tier or the persistence tier, and will be available for both server-side application programming, as well as rich client Swing application developers.
This API is seen as a general extension to the JavaBeans object model, and as such is expected to be used as a core component in other specifications, such as JSF, JPA, and Bean Binding.

위 내용을 정리하면 다음과 같다.

  • 데이터 검증은, 어플리케이션의 서로 다른 레이어에서 (from the presentation tier to the persistence layer) 반복적으로 수행되는 작업이다.
  • 각 계층에서 이러한 데이터 검증이 재구현되는 것을 피하기 위해, 많은 개발자들은 검증 코드를 클래스 안에 포함시킨다.
  • 이 검증 코드는 해당 클래스의 meta-data (데이터에 대한 정보를 제공하는 데이터) 이다.
  • JSR 303은, JavaBean validation 을 위한 meta-data 모델과 API 를 정의한다.
  • 기본적인 meta-data 는 오버라이드 및 확장이 가능한 어노테이션 기반이다.

Hibernate Validator

Bean Validation 스팩은 현재 2.0 까지 제안되었다.

  1. JSR 303 (Bean Validation)
  2. JSR 349 (Bean Validation 1.1)
  3. JSR 380 (Bean Validation 2.0)

그런데 위 JSR 은 스팩일 뿐, 구현체는 아니다.
검증된 구현체로는 Hibernate Validator 가 있다.
각 JSR 에 따라, Hibernate Validator 의 버젼은 다음과 같다.

Read more

Spring WebFlux Thread Model

Spring Webflux 에서는 어떤 thread 들이 어떻게 request 를 처리하는지 정리한다.

Threads: reactor-http-nio

1
2
3
4
On a “vanilla” Spring WebFlux server (for example, no data access nor other optional dependencies), 
you can expect one thread for the server and several others for request processing (typically as many as the number of CPU cores).
Servlet containers, however, may start with more threads (for example, 10 on Tomcat),
in support of both servlet (blocking) I/O and servlet 3.1 (non-blocking) I/O usage.

Spring 공식 문서에 따르면,
부가적인 dependency 가 없는 Spring WebFlux 서버는,

  1. 서버를 위한 thread 하나와
  2. 요청 처리를 위한 여러 thread 들로 구성된다.

spring-boot-starter-webflux dependency 만 추가해서 project 하나를 만들어보자.

그리고, 아래와 같이 ‘1,2,3’ 을 응답하는 간단한 endpoint 를 추가하자.

1
2
3
4
5
6
7
8
9
10
11
12
13
@RestController
@RequestMapping
class NumbersController {

private val logger = LoggerFactory.getLogger(this::class.java)

@GetMapping("/local")
fun getNumbers(): Flux<Int> {
logger.info("-- getNumbers")

return Flux.fromIterable(listOf(1, 2, 3))
}
}

App 을 실행시키고, 해당 endpoint 를 호출해보자.

Read more

Spring Web Flux : Reactive

스프링캠프 2017 에서 Toby 님이 발표한 Spring Web Flux 의 다음 내용을 정리한다.

  • WebFlux 를 사용하며 개선할 포인트
  • Data Access Repository
  • Non Blocking API call

Blocking IO

WebFlux 를 사용하는데, 서비스 로직에서 Blocking IO 가 사용되는 코드가 많으면 성능이 오히려 나빠질 수 있다.

개선할 blocking IO 는 다음과 같은 것들이 있다.

  1. data access repository 를 호출
  2. HTTP API 호출
  3. 기타 네트워크를 이용하는 서비스

JDBC 기반 RDB 연결

JDBC API 는 아쉽게도, Blocking 메서드로 점철되었다.
이 부분을 다음과 같이 개선해서, 서블릿 스레드를 점유하지 않도록 만들 수 있다.

  • @Async 비동기를 적용해서,
  • CompletableFuture 리턴하게 하여
  • 서블릿 스레드만 빨리 스레드풀에 리턴하게 함으로써 가용한 자원으로 만들 수 있다.

예를 들어,
repository 의 메서드에 다음과 같이 @Async 를 붙인다.

Read more

Spring Web Flux : @MVC

스프링캠프 2017 에서 Toby 님이 발표한 Spring Web Flux 의 다음 내용을 정리한다.

  • annotation 방식의 @MVC 와 유사한 WebFlux 개발 방법

@MVC WebFlux : 01

annotation 방식의 @MVC 방식과 유사하면서
비동기 + 논블러킹 리액티브 스타일의 코드 작성이 가능하다.

1
2
3
4
5
6
7
@RestController
class MyController {

@GetMapping("hello/{name}")
fun hello(request: ServerRequest): Mono<ServerResponse> =
ok().body(fromObject(request.pathVariable("name")))
}
  • 요청 정보가 미리 바인딩되지 않아, ServerRequest.pathVariable() 로 가져온다.
  • 응답은, Mono 에 감싸진 ServerResponse 를 응답한다.
  • 상태 코드와 바디를 명시적으로 선언한다.

@MVC WebFlux : 02

위 코드는, 더 이전 스타일로 표현 가능하다.
가장 대표적인 @MVC WebFlux 작성 방식이다.

1
2
3
@GetMapping("hello/{name}")
fun hello(@PathVariable name: String): Mono<String> =
Mono.just("Hello $name")
  • 파라미터 바인딩을 MVC 방식 그대로 한다.
  • 그리고, 핸들러 로직의 결과를 Mono/Flux 타입으로 리턴한다.
Read more

Spring Web Flux : Functional

스프링캠프 2017 에서 Toby 님이 발표한 Spring Web Flux 의 다음 내용을 정리한다.

  • 함수형 스타일의 WebFlux 가 웹 요청을 처리하는 방식
  • 함수형 스타일의 WebFlux 장/단점

Spring 이 웹 요청을 처리하는 방식

다음 순서로 진행된다.

  1. 요청 매핑
    웹 요청을 어느 handler 에게 보낼지 결정한다. MVC 에서는 @RequestMapping 을 이용한다.

  2. 요청 바인딩
    handler 에 전달할 웹 요청을 준비한다.
    (URL Path, Header, Cookie 정보를 가져옴, body 의 json 을 자바 오브젝트로 바인딩…)

  3. 핸들러 실행
    전달 받은 요청 정보를 이용해 로직을 수행한다.

  4. 핸들러 결과 처리
    handler 의 return 값으로 웹 응답으로 변환한다.

전통적인 방식의 다음 코드를 보자.

1
2
3
4
5
6
7
8
@RestController
class MyController {

@GetMapping("hello/{name}")
fun hello(@PathVariable name: String): String {
return "Hello $name"
}
}

@GetMapping 을 통해 요청을 매핑하고, @PathVariable 을 통해 요청을 바인딩한다.
그리고, return “Hello $name” 에서 핸들러를 실행하고 결과를 처리한다.

참고로,

  • 기존에는 @RequestMapping 과 메서드 타입을 사용했는데, Spring 4.xx 에서 @GetMapping, @PostMapping.. 이 등장했다.
  • 또한, @RestController 이므로 response body 에 문자열이 그대로 들어간다.
  • 특별한 Content-Type 을 지정하지 않으면, text/plain 으로 지정된다.
Read more

Spring Web Flux : 소개

스프링캠프 2017 에서 Toby 님이 발표한 Spring Web Flux 의 다음 내용을 정리한다.

  • WebFlux 사용 이유
  • WebFlux 개발 방식
  • WebFlux 의 주요 특징

사용 이유

Thread, CPU, Memory 등 자원을 낭비하지 않고 더 많은 요청을 처리할 수 있는 고성능 Web Application 을 만들 수 있다.
이런 부분에서 효율성을 극대화할 수 있는 경우는, 서비스 간 호출이 많은 Microservice Architecture 가 있다.

개발 방식

두 가지 개발 방식을 지원한다.

  1. 기존의 @MVC 방식 : @Controller, @RequestMapping 등 annotation 을 사용한다.
  2. 함수형 모델 : annotation 에 의지하지 않고, RouterFunction 과 HandlerFunction 를 사용한다.

주요 특징

  1. Servlet 기반이 아니다. (서블릿 지원하는 컨테이너에서 동작할 수 있게 호환성은 가지고 있음)
  2. ServerRequest, ServerResponse 을 사용한다. (HTTP Request, Response 를 추상화한 새로운 모델)

지원하는 웹 서버 컨테이너

Read more

[전문가를 위한 스프링 5] 4장_스프링 구성 상세와 스프링 부트

1. Bean Life Cycle

IoC 컨테이너가 제공하는 주요 기능 중 하나는, 빈의 생성이나 소멸 같은 라이프 사이클의 특정 시점에 통지를 받을 수 있도록 빈을 생성하는 것이다.
일반적으로 두 가지 라이프사이클 이벤트가 있다.

  1. post-initialization event : 스프링이 개발자가 구성한 대로 빈에 모든 프로퍼티 값을 설정하고 의존성 점검을 마치자 마자 발생
  2. pre-destruction event : 스프링이 빈 인스턴스를 소멸시키기 바로 전에 발생

요청을 받을 때 마다 스프링 컨테이너가 매번 빈을 생성하는 Prototype 빈에는, 스프링이 소멸 전 이벤트를 통지하지 않는다.

빈이 이런 라이프사이클 이벤트를 받을 수 있는 메너니즘은 세 가지가 있다.

  1. inteface 기반
  2. method 기반
  3. annotation 기반

2. 빈 생성 시점에 통지 받기

  1. 빈 생성 시 메서드 실행
    초기화 메서드로 제대로 빈이 구성되었는지 확인할 수 있다.
    다음은, xml 파일에 default-init-method 애트리뷰트에 초기화 메서드를 지정하였다.

    1
    2
    3
    4
    5
    6
    7
    8
    9
    10
    11
    12
    13
    14
    15
    16
    17
    18
    19
    20
    21
    22
    23
    24
    25
    26
    27
    28
    public class Singer {
    private static final String DEFAULT_NAME = "Eric Clapton";

    private String name;
    private int age = Integer.MIN_VALUE;

    public void setName(String name) {
    this.name = name;
    }

    public void setAge(int age) {
    this.age = age;
    }

    private void init() {
    System.out.println("빈 초기화");

    if (name == null) {
    System.out.println("기본 이름 사용");
    name = DEFAULT_NAME;
    }

    if (age == Integer.MIN_VALUE) {
    throw new IllegalArgumentException(
    Singer.class +" 빈 타입에는 반드시 age 프로퍼티를 설정해야 합니다.");
    }
    }
    }
    1
    2
    3
    4
    5
    6
    7
    8
    9
    10
    11
    12
    13
    14
    15
    16
    17
    18
    19
    20
    21
    <?xml version="1.0" encoding="UTF-8"?>

    <beans xmlns="http://www.springframework.org/schema/beans"
    xmlns:xsi="http://www.w3.org/2001/XMLSchema-instance"
    xmlns:p="http://www.springframework.org/schema/p"
    xsi:schemaLocation="http://www.springframework.org/schema/beans
    http://www.springframework.org/schema/beans/spring-beans.xsd"
    default-lazy-init="true" default-init-method="init">

    <bean id="singerOne"
    class="com.apress.prospring5.ch4.Singer"
    p:name="John Mayer" p:age="39"/>

    <bean id="singerTwo"
    class="com.apress.prospring5.ch4.Singer"
    p:age="72"/>

    <bean id="singerThree"
    class="com.apress.prospring5.ch4.Singer"
    p:name="John Butler"/>
    </beans>
  2. InitializingBean 인터페이스 구현하기
    위 코드의 init() 메서드와 같은 역할을 하는 afterPropertiesSet() 메서드를 정의한다.

    1
    2
    3
    4
    5
    6
    7
    8
    9
    10
    11
    12
    13
    14
    15
    16
    17
    18
    19
    20
    21
    22
    23
    24
    25
    26
    27
    28
    29
    public class SingerWithInterface implements InitializingBean {
    private static final String DEFAULT_NAME = "Eric Clapton";

    private String name;
    private int age = Integer.MIN_VALUE;

    public void setName(String name) {
    this.name = name;
    }

    public void setAge(int age) {
    this.age = age;
    }

    public void afterPropertiesSet() throws Exception {
    System.out.println("빈 초기화");

    if (name == null) {
    System.out.println("기본 가수 이름 설정");
    name = DEFAULT_NAME;
    }

    if (age == Integer.MIN_VALUE) {
    throw new IllegalArgumentException(
    SingerWithInterface.class
    +" 빈 타입에는 반드시 age 프로퍼티를 설정해야 합니다.");
    }
    }
    }
  3. JSR-250 @PostConstruct 어노테이션 사용하기
    빈 클래스 내에서 스프링이 호출할 메서드를 지정한다.

    1
    2
    3
    4
    5
    6
    7
    8
    9
    10
    11
    12
    13
    14
    15
    16
    17
    18
    19
    20
    21
    22
    23
    24
    25
    26
    27
    28
    29
    30
    public class SingerWithJSR250 {
    private static final String DEFAULT_NAME = "Eric Clapton";

    private String name;
    private int age = Integer.MIN_VALUE;

    public void setName(String name) {
    this.name = name;
    }

    public void setAge(int age) {
    this.age = age;
    }

    @PostConstruct
    private void init() throws Exception {
    System.out.println("빈 초기화");

    if (name == null) {
    System.out.println("기본 가수 이름 설정");
    name = DEFAULT_NAME;
    }

    if (age == Integer.MIN_VALUE) {
    throw new IllegalArgumentException(
    SingerWithJSR250.class
    +" 빈 타입에는 반드시 age 프로퍼티를 설정해야 합니다.");
    }
    }
    }
  4. @Bean 으로 초기화 메서드 선언하기
    자바 구성 클래스에서 빈을 선언할 때 사용한다. @Lazy 는 xml 의 default-lazy-init=”true” 와 동일하다.

    1
    2
    3
    4
    5
    6
    7
    8
    9
    10
    11
    12
    13
    14
    15
    16
    17
    18
    19
    20
    21
    22
    23
    24
    25
    26
    27
    28
    29
    30
    public class SingerConfigDemo {

    @Configuration
    static class SingerConfig {
    @Lazy
    @Bean(initMethod = "init")
    Singer singerOne() {
    Singer singerOne = new Singer();
    singerOne.setName("John Mayer");
    singerOne.setAge(39);
    return singerOne;
    }

    @Lazy
    @Bean(initMethod = "init")
    Singer singerTwo() {
    Singer singerTwo = new Singer();
    singerTwo.setAge(72);
    return singerTwo;
    }

    @Lazy
    @Bean(initMethod = "init")
    Singer singerThree() {
    Singer singerThree = new Singer();
    singerThree.setName("John Butler");
    return singerThree;
    }
    }
    }

빈 생성은 다음과 같은 단계를 거친다.

  1. 빈 생성 위해 생성자 호출
  2. 의존성 주입 (수정자 호출)
  3. 사전 초기화 담당하는 BeanPostProcessor 기반 빈들에게 호출해야하는 메서드 있는지 확인 요청한다. 여기서 BeanPostProcessor 는 빈이 생성된 이후에 빈 조작을 수행하는 스프링에 특화된 인터페이스다.
  4. @PostContruct 어노테이션은 CommonAnnotationBeanPostProcessor 빈에 등록되므로, CommonAnnotationBeanPostProcessor 빈이 @PostContruct 어노테이션이 적용된 메서드 호출
  5. InitializingBean 의 afterPropertiesSet 메서드 실행
  6. init-method 애트리뷰트로 지정한 빈의 실제 초기화 메서드를 마지막에 실행
Read more

Logback

Logback 이 무엇이고, 어떻게 사용하는지 정리한다.

1. SLF4J (Simple Logging Facade for Java)

우선 SLF4J 가 무엇인지 알아보자.
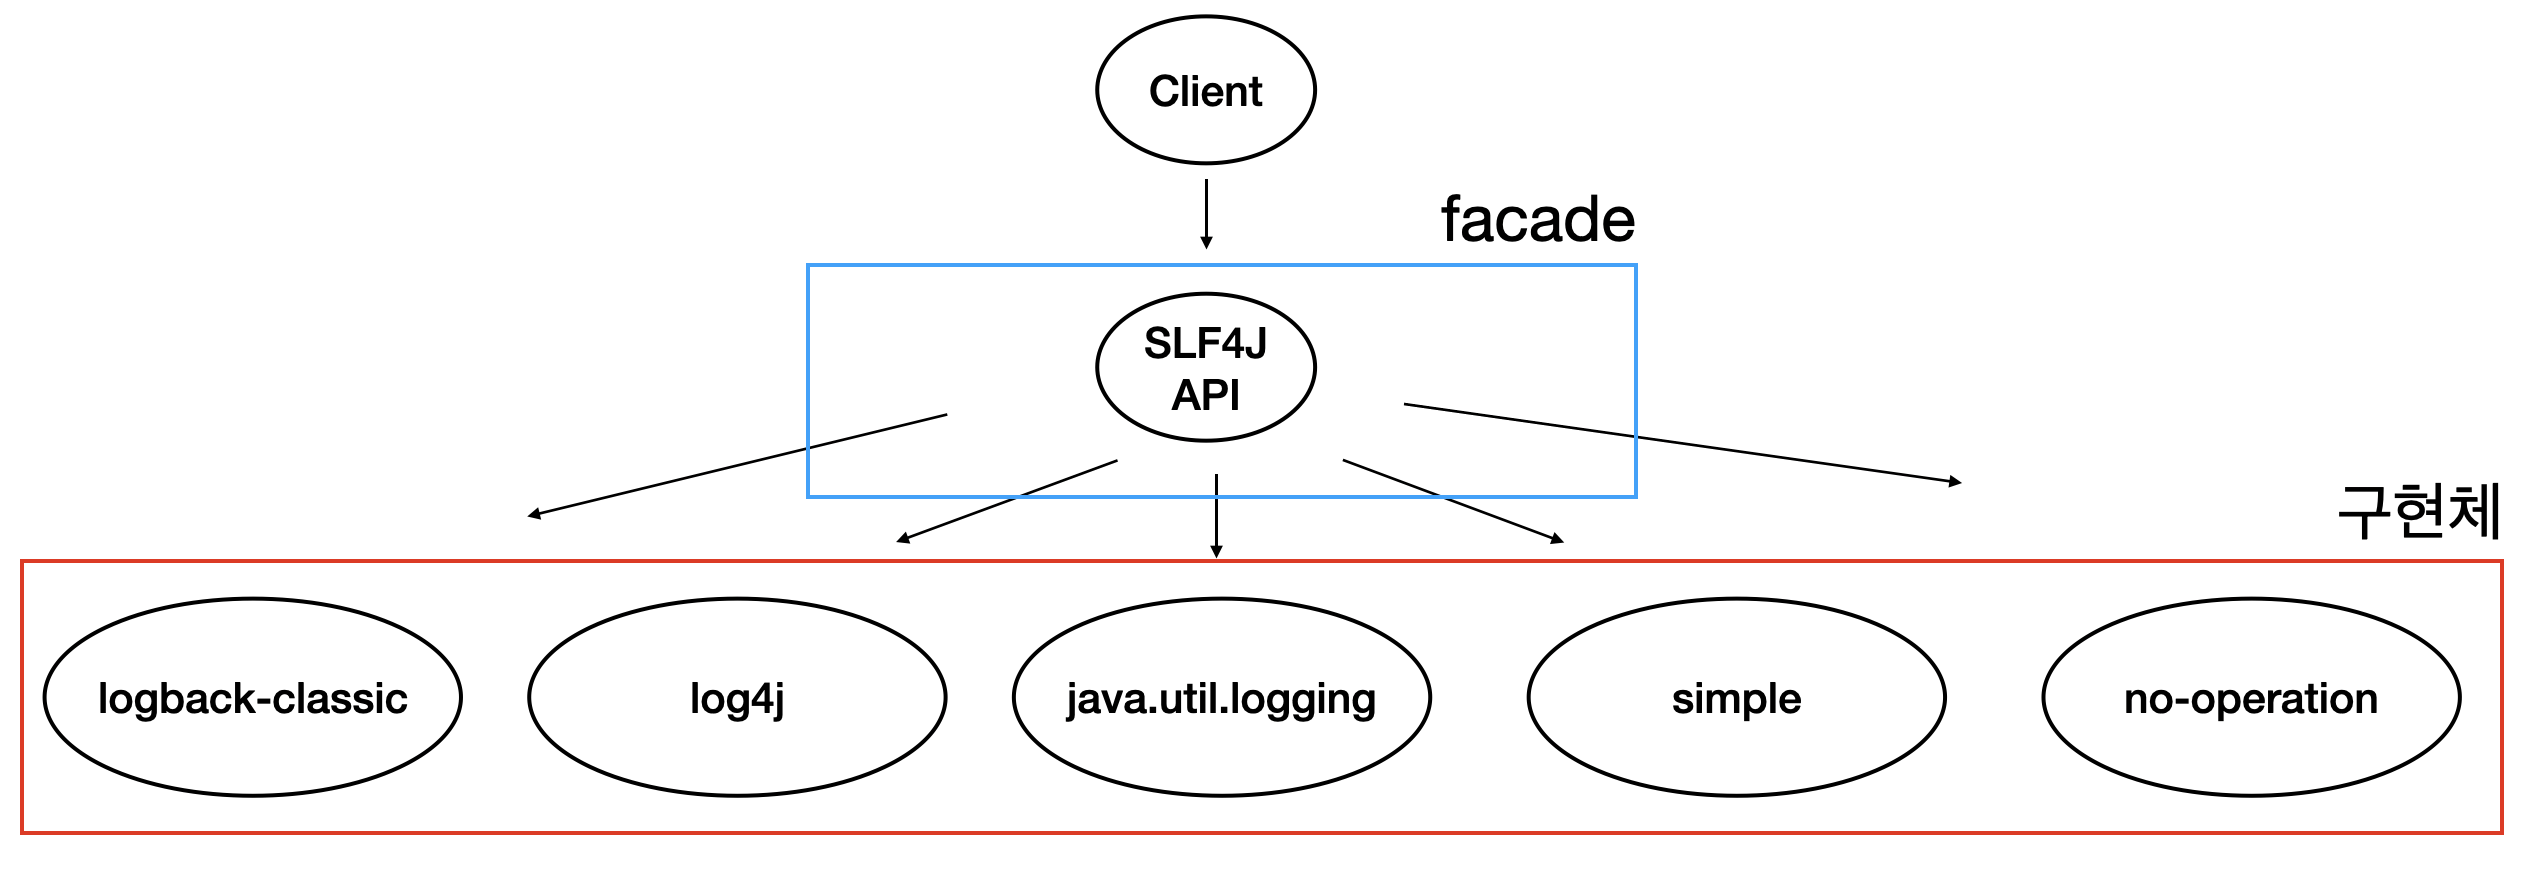
공식 문서 (http://www.slf4j.org/manual.html) 에 따르면, SLF4J 는 java.util.logging, logback 및 log4j 와 같은 다양한 Logging Framework 에 대한 Facade 또는 추상화 역할을 한다.
그래서, SLF4J 는 개발자가 원하는 Logging Framework 를 plug-in 할 수 있도록 지원한다. 예를 들면, SLF4J Facade 덕분에 log4j 구현체를 사용하다가 logback 구현체로 변경하여도 일관된 방식으로 logging 이 가능하다.

2. Logback

logback 은 log4j 의 후속 프로젝트이다. 왜 log4j 대신에 logback 를 사용해야하는지는 공식 문서 (http://logback.qos.ch/reasonsToSwitch.html) 를 참고하자.
이제 실제 프로젝트에 적용을 해보자.

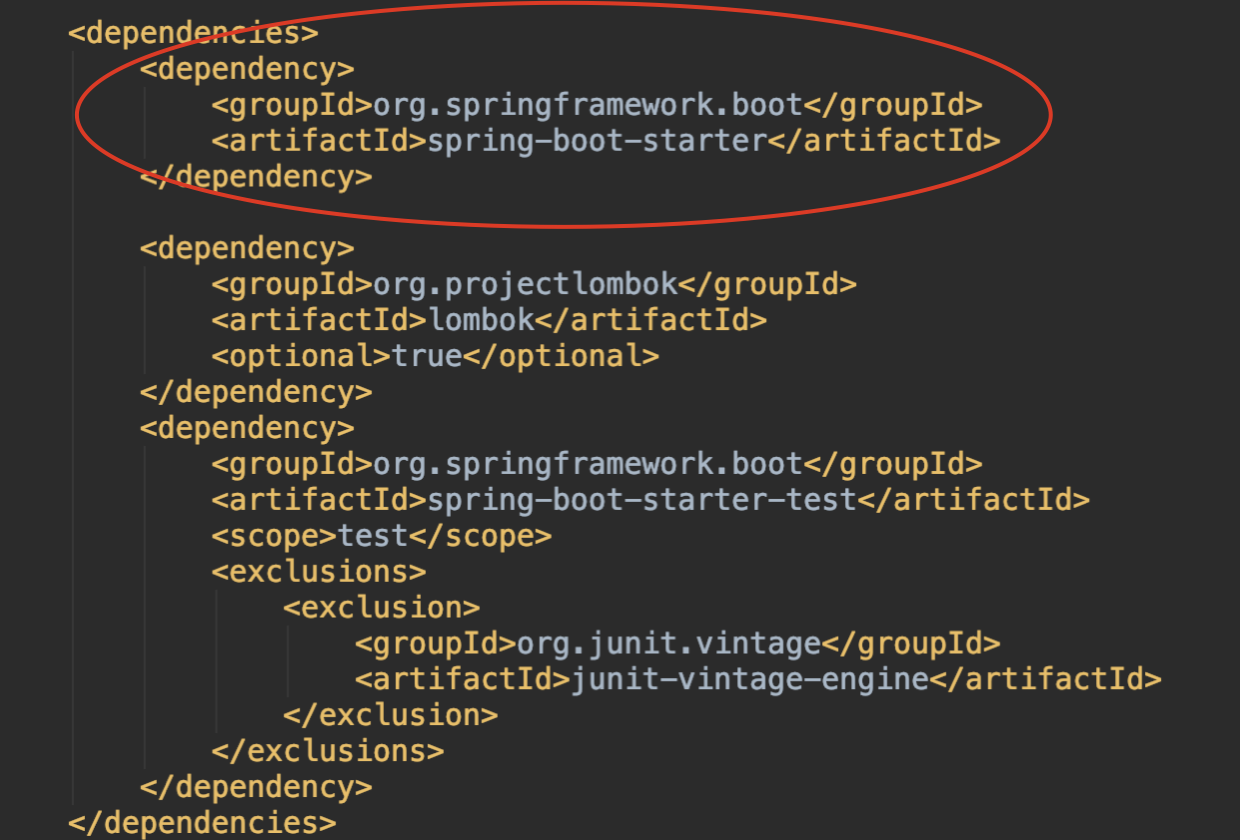
3. 의존성 확인

의존 관계 tree 를 명확히 확인하기 위해 maven 기반으로 프로젝트를 생성하였다.
pom.xml 에는 다음과 같이 spring-boot-starter 가 포함되어 있다.

그리고, spring-boot-starter 를 따라가면, 다음과 같이 spring-boot-starter-logging 이 포함되어 있다.

Read more